All Categories
Featured
Table of Contents
- – Travel Trailer Roof Replacement Walnut, CA
- – OCRV Center
- – Travel Trailer Service Walnut, CA
- – Cargo Trailer Repair Walnut, CA
- – Rv Trailer Repair Shops Near Me Walnut, CA
- – Rv Travel Trailer Repair Near Me Walnut, CA
- – Camping Trailer Repair Near Me Walnut, CA
- – Trailer Restoration Walnut, CA
- – Fifth Wheel Service Walnut, CA
- – Travel Trailer Replacement Windows Walnut, CA
- – Camping Trailer Repair Near Me Walnut, CA
- – Rv Trailer Repair Near Me Walnut, CA
- – Travel Trailer Service Walnut, CA
- – Trailer Window Replacement Walnut, CA
- – Travel Trailer Replacement Windows Walnut, CA
- – Travel Trailer Floor Repair Walnut, CA
- – OCRV Center
Travel Trailer Roof Replacement Walnut, CA
See the eating hall agreement. Call 800-933-7275 to reserve. Terminations made 61 days or even more ahead of the booking beginning day will be billed a 50% non-refundable cancellation fee. Terminations made 60 days or much less prior to the reservation begin day are not qualified for a refund. The primary workplace at the park entry sells gifts, keepsakes and snacks.
The Nature Center and Exploration Facility are in the visitor facility, concerning 2.5 miles from the major park entrance, and has online pet displays, park details and interactive screens. Visitor center hours vary throughout the year so call the park beforehand. None. This park has a treat bar in season.
The visitor center, which provides info about the park's features and amenities, additionally houses the Nature Facility and the Exploration. The Discovery Center allows site visitors discover an interactive camp-scape consisting of a model yurt.
The facility was opened in 2017 thanks partly to assist from the Yard Club of Virginia and corporate and private donors.: The Civilian Conservation Corps (CCC) Museum is housed in an original CCC building. It highlights the lots of success of the CCC. Heritage Amphitheater - First constructed by the CCC in 1938 and rebuilt in 1997, this outdoor venue holds up to 2,000.
Travel Trailer Service Walnut, CA
The amphitheater has bench seats for approximately 350, and extra viewers take seats on a mild, grassy incline. The location has a raised phase with a background, toilets, walkways, a snack bar and a box office. Vendors usually establish booths and display screens and have activities in an exhibition location at the top of the amphitheater hillside.
Amphitheater: The outside amphitheater is easily accessible, with steep smooth pathways from the ticket booth location. The park helps guests in getting to and from the amphitheater auto parking whole lot and seats for park-sponsored occasions.
The park is the ideal outdoor class for trainees of all ages. The park has an excellent, fun swimming pool marine facility, watercraft leasings and a treat bar throughout the summer months. Open year-round, a present store in the park office supplies mementos.
Cargo Trailer Repair Walnut, CA
Nancy Roberts, a senior at Thomas Dale High College, submitted the winning entrance, Pocahontas Memorial State Park. Pocahontas was the daughter of Chief Powhatan, who ruled over tribes in the Powhatan Confederacy of the Algonquin Nation. Legend has it that she saved Capt. John Smith's life when he was held captive by the Powhatan Confederacy.
She died in London from an obscure disease. The location was renamed Pocahontas State Park and Pocahontas State Forest and was collectively operated by DCR and the Virginia Division of Forestry. Today the entire area is run by DCR as Pocahontas State Park. Pocahontas has an energetic area of volunteers that add more than 20,000 hours a year.
Feel like providing nature a hand? Learn just how you can aid out. There are no fees or charges, and the team meets at the park on the third Tuesday of each month.
Rv Trailer Repair Shops Near Me Walnut, CA
The plans are updated a minimum of once every 10 years after that. The strategies cover the size, types, framework and places of centers along with the website's unique attributes and sources. Three public meetings are held during the preliminary growth of each strategy. Visit this site for this park's master plan.
Keep in mind the motion picture, "The Black Stallion?" It was a story about a young child and a wild Arabian bread horse shipwrecked on a deserted island. Through persistence and consistency, the young boy gained the depend on of the equine and they developed a strong, lifelong bond. There are scenes where the rider and steed flow together as one, trotting via the browse.
Rv Travel Trailer Repair Near Me Walnut, CA
Myers had to uncover her desire and then discover the decision to see the desire become a truth (Travel Trailer Repairs Walnut). Next off, Myers had to discover the perfect steed and assistance team to bring the dream with.
VTC Southern Girl and VTC Juztice are Arabian steeds reproduced and raised by Reid at their Darkness Ranch ranch. Myers was 12 when she began working with VTC Juztice.
Camping Trailer Repair Near Me Walnut, CA
Myers likewise educated VTC Southern Girl, a filly she required to the AHA National reveal 2 years ago. She started working with her when the filly was only four weeks old. A large part of educating a steed is to earn its depend on. Myers made use of uniformity, being calm, making use of favorable, gentle, hands-on training with a peaceful voice; and hanging out to earn VTC Juztice's trust fund.
There were days of rips and stress. She started near the bottom and functioned her way up to the top. She is not worried of tough work and she stayed with it, no matter what the challenges, even when it was difficult. VTC Juztice was very, really environment-friendly (little experience and training) and required a great deal of training to reach where he is currently," claimed Reid.
Trailer Restoration Walnut, CA
"The Expense of the Arabian National Equine Program entries was $2,500. In order to aid pay these costs, Myers competed and won 2 scholarships.
Leading 10 in Second Degree Dressage and 3rd overall. In Dressage Seat Equitation she put 4th total. She placed in Top 10 Arabian Sport Horse Show Hack Junior to Adventure, Leading Ten Arabian Sporting Activity Steed Program Hack Open (7th), Top Ten First Level Dressage Junior to Trip (5th), Top Ten Second Degree Dressage Open (sixth), Top 10 Second Level Dressage Junior to Experience (3rd), missed out on get by.5, Leading 10 Dressage Equitation Riders 15 18 years of ages (fourth ).
Fifth Wheel Service Walnut, CA
Myers will certainly be attending New River Area College for additional college training courses, after that moving to Virginia Western Community College for a degree in Healthcare as a Radiology Technician. Myers stated she would recommend taking lessons from Reid. "If you wish to learn to ride and reveal, find someone that knows horses, has a good barn, and agrees to work with you.
Midway Trailer Business & Service is a certified trailer dealership offering the Midwest. We are honored to carry a big selection of brand-new and pre-owned inventory. When you are prepared to purchase a new trailer, our pleasant and knowledgeable sales, financing, service, and components divisions are prepared to see to it your experience is exceptional, From assisting while you're making your selection to continuous upkeep and modification, we are here for you.
Travel Trailer Replacement Windows Walnut, CA
We strive for unequalled client service, due to the fact that we recognize that if we do not care for you, the client, a person else will. So come on by, inform us about yourself and what you're seeking, and we'll do our best to make it take place! For many years our group has verified, time and again, that we will certainly go out of our means to obtain you what you want, for the cost you want! Client contentment is our leading concern.
Web page not located! Sorry the page you are looking for might have been moved or removed.
D2 Trailer Sales and Solution opened in the town of Galt in 1995. As time has passed we have actually expanded and increased but still continue to be in the exact same place, on the frontage roadway encountering Freeway 99. We are a family-owned service with all of our team's primary focus getting on client service.
Camping Trailer Repair Near Me Walnut, CA
We are a full-service dealer that markets and funds both new and previously owned trailers. Our service supervisor has over 30 years of hands-on experience.
is greater than simply a motor home repair store; we're a three-way hazard in the sector. Primarily, our slave's heart drives us to go above and past for our customers. Second, our team has substantial recreational vehicle repair service and trailer upkeep expertise and knowledge. Third, we focus on searching for and setting up the best accessories for your automobile, guaranteeing you're fully equipped for your following journey.
Every trailer repair work project we undertake is different and on a case by case basisbut don't worry, the expert group at Final Touch RV has experience dealing with all sorts of RV and horse trailer roofs, floor covering and bodywork. We will certainly go over the repair service alternatives with you so you can make the best choice based on your preferences and budget.
Rv Trailer Repair Near Me Walnut, CA
The trucking sector is at the core of commerce in our country, and we have been serving this bedrock industry for a really lengthy time. Johnsen Trailer Sales, Inc. was established in 1959 in Bismarck, North Dakota, when things were a lot various than they are today. We have actually been selling, servicing, and keeping semi-trailers in the area ever since, and our abilities have advanced together with the sector.
We have had the ability to remain in the semi-trailer sales and service company for this long due to the fact that we have actually constructed a strong online reputation throughout the states that we serve. We are based in North Dakota, with places in Fargo and Bismarck. We likewise offer customers in Wyoming, Montana, South Dakota, Minnesota, and parts of Canada.
Our reach is considerable since of the vast need for the tools and solutions that we provide. Throughout the years, we have actually recognized the leading semi-trailer producers in the industry. We are factory-authorized dealerships for Wilson, Hyundai, Talbert, Manac, and Muv-All Low Child. These are names that reverberate loudly within the trucking market, and our long-lasting partnerships enable us to negotiate the most affordable prices.
Travel Trailer Service Walnut, CA
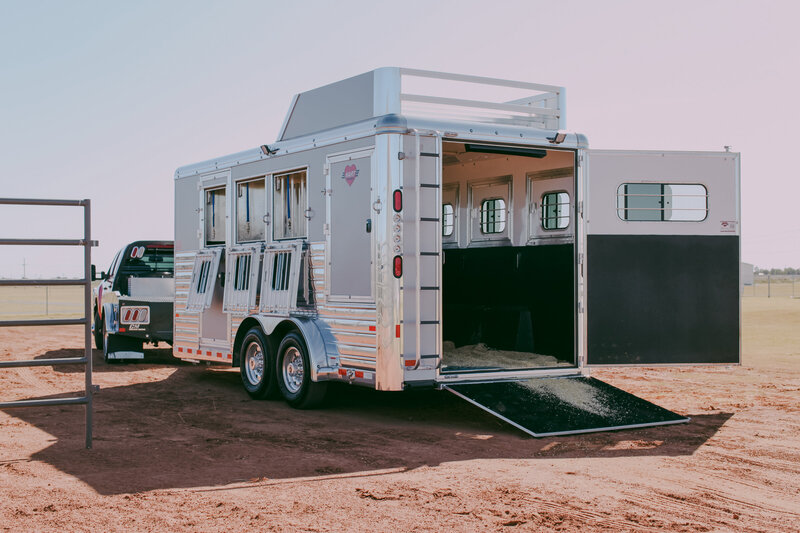
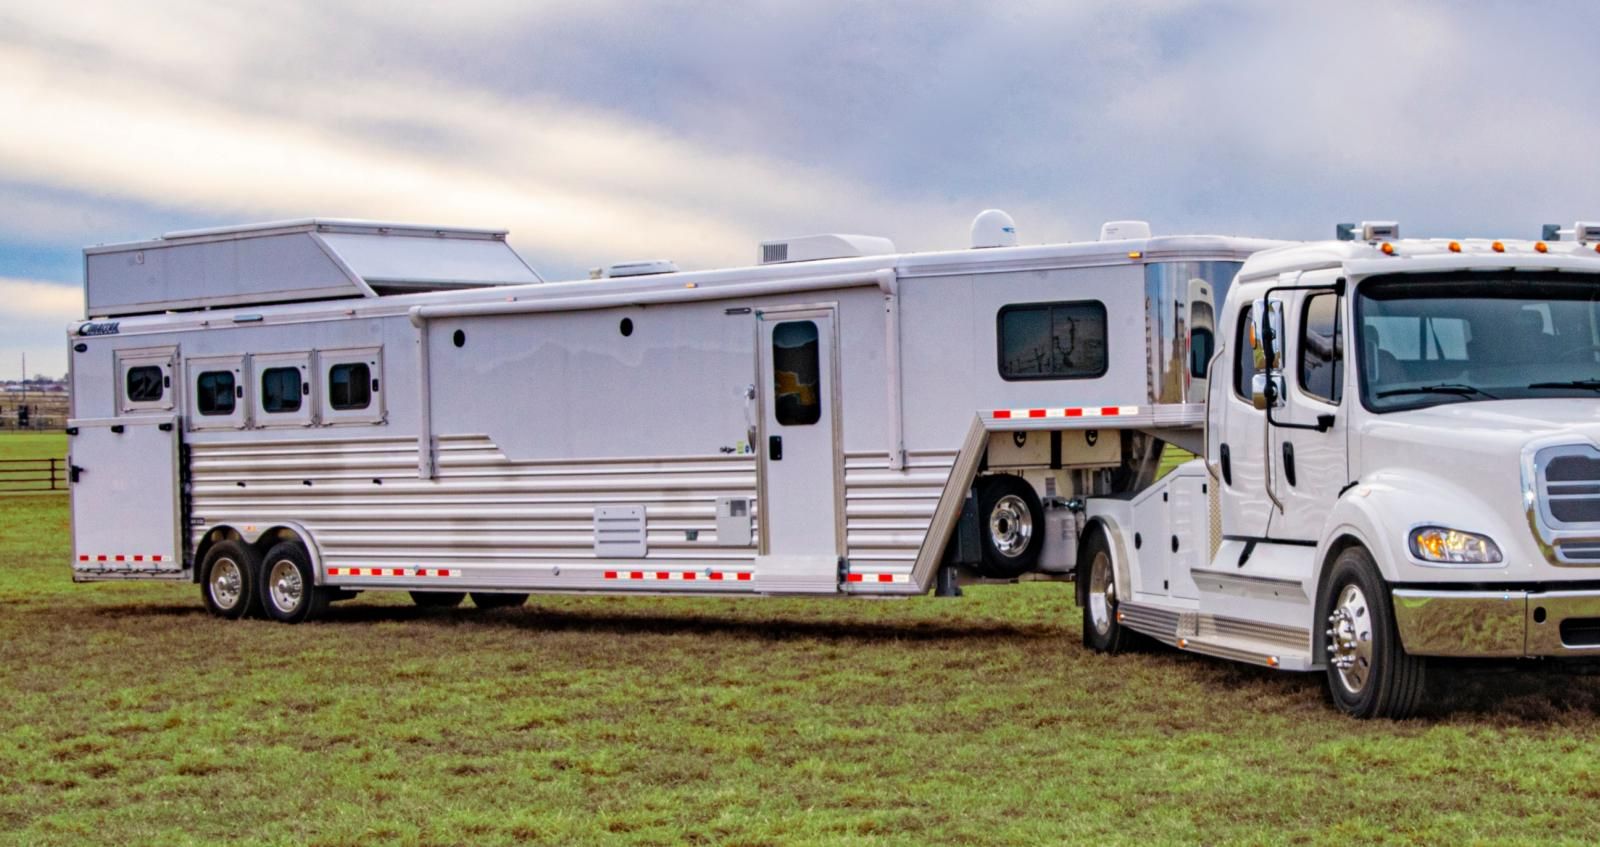
Horse trailers and other livestock hauling demands vary fits and sizes. They all share the goal of safely moving your cherished pets to their next great journey. The recreational vehicle repair work and trailer fixing group at Ernie's in Olympia is dedicated to guaranteeing this happens flawlessly, using experience in animals transporting or equine trailer solution and repair services.
We're experienced in collaborating with all trailer types, from boat trailers to steed trailers and travel trailer solution. Lexington, SC Red Financial Institution, SC Oak Grove, SC 7 Oaks, SC Columbia, SC Springdale, SC Fairfield Area, SC Lexington Area, SC Richland Region, SC Newberry County, SC Saluda Region, SC Calhoun County, SC Aiken Region, SC Chapin, SC We offer freight trailer solutions and take a trip trailer solution in the midlands of SC with a 50-mile span of Columbia, SC.
Trailer Window Replacement Walnut, CA
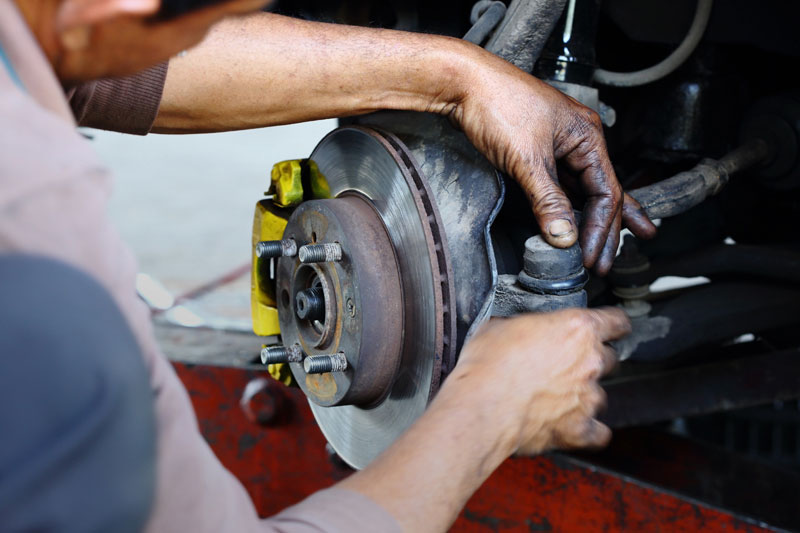
Offering Farmington Hills, Farmington, Novi, Livonia, Northville Given That 1958 When it comes to your horses, security always comes. Before you load your equines right into the trailer, make sure to hook up and do a quick assessment of the tires and lights. Maintain a tire scale handy and examine that the tire is holding the proper pressure (referred to as PSI).
Dry rot can occur also if the tire tread still looks terrific, and as soon as those splits reveal up, your tire comes to be jeopardized. Since of completely dry rot, you need to intend on replacing tires every 3 to five years no matter of appearance.
Travel Trailer Replacement Windows Walnut, CA
The right pressure for your equine trailer tires is located right on the tires. Equine trailers require particular tires, largely since of the lots they're lugging.
If you have actually ever been to our shop, you will rapidly see that horse trailers are our specialized. We developed a distinct bond with numerous customers for many years that return year after year to ensure they have a risk-free trailer prior to they carry any one of their horses. A lot of our on-site services are done at equine barns.
Travel Trailer Floor Repair Walnut, CA
Numerous horse proprietors simply desire us to execute a security check. They desire to know their trailer is safe for their beloved horses because allow's encounter it, some people like their equines even more than they like people.
Anything from kicking a door to peing on the flooring boards creating moisture in between the floor covering and the timber. We change a lot of timber floorings guaranteeing the architectural stability of the trailer and a secure adventure for the equines. We also do a lot of hot stress cleaning of the inside and exterior of equine trailers.
OCRV Center
Address: 23281 La Palma Ave Yorba Linda, CA 92887Phone: (714) 909-1444
Email: art@ocrvcenter.com
OCRV Center
Most of the time, he is the one that responds to the phone. We even push cleaned the within of an equine barn.
Travel Trailer Ceiling Repair Walnut, CACamper Floor Repair Near Me Walnut, CA
Rv Trailer Repair Near Me Walnut, CA
Trailer Window Replacement Walnut, CA
Rv Trailer Repair Shop Walnut, CA
Rv Trailer Service Near Me Walnut, CA
Fifth Wheel Service Walnut, CA
Rv Trailer Service Near Me Walnut, CA
Travel Trailer Ceiling Repair Walnut, CA
Trailer Window Replacement Walnut, CA
Travel Trailer Furniture Walnut, CA
Rv Trailer Service Near Me Walnut, CA
Travel Trailer Siding Repair Walnut, CA
Fifth Wheel Service Walnut, CA
Fifth Wheel Service Walnut, CA
Rv Trailer Repair Shop Walnut, CA
Travel Trailer Siding Repair Walnut, CA
Travel Trailer Furniture Walnut, CA
Trailer Restoration Walnut, CA
Trailer Roof Repair Walnut, CA
Rv Trailer Repair Shop Walnut, CA
Travel Trailer Roof Replacement Walnut, CA
Travel Trailer Window Replacement Walnut, CA
5th Wheel Repair Near Me Walnut, CA
Horse Trailer Repairs Walnut, CA
Travel Trailer Repairs Walnut, CA
Rv Trailer Repair Shops Near Me Walnut, CA
Travel Trailer Repairs Walnut, CA
Travel Trailer Ceiling Repair Walnut, CA
Camping Trailer Repair Near Me Walnut, CA
Horse Trailer Repair Near Me Walnut, CA
Travel Trailer Ceiling Repair Walnut, CA
Trailer Floor Repair Walnut, CA
Trailer Floor Repair Walnut, CA
5th Wheel Repair Near Me Walnut, CA
Fifth Wheel Repair Near Me Walnut, CA
Travel Trailer Repairs Walnut, CA
Travel Trailer Service Walnut, CA
Camper Trailer Service Walnut, CA
Trailer Window Replacement Walnut, CA
Trailer Restoration Walnut, CA
Travel Trailer Floor Repair Walnut, CA
Travel Trailer Service Walnut, CA
Travel Trailer Siding Repair Walnut, CA
Horse Trailer Repairs Walnut, CA
Travel Trailer Siding Repair Walnut, CA
Travel Trailer Repairs Walnut, CA
Rv Trailer Repair Shop Walnut, CA
Rv Trailer Service Near Me Walnut, CA
Travel Trailer Repairs Walnut, CA
Fifth Wheel Repair Near Me Walnut, CA
Fifth Wheel Repair Near Me Walnut, CA
Travel Trailer Floor Repair Walnut, CA
Travel Trailer Window Replacement Walnut, CA
Horse Trailer Repair Near Me Walnut, CA
Travel Trailer Service Walnut, CA
Trailer Restoration Walnut, CA
5th Wheel Repair Near Me Walnut, CA
Fifth Wheel Repair Near Me Walnut, CA
Travel Trailer Roof Replacement Walnut, CA
Travel Trailer Awning Replacement Walnut, CA
Trailer Windows Replacement Walnut, CA
Trailer Restoration Walnut, CA
Horse Trailer Repair Near Me Walnut, CA
Rv Trailer Repair Shops Near Me Walnut, CA
Trailer Windows Replacement Walnut, CA
Rv Trailer Service Near Me Walnut, CA
Rv Trailer Repair Shop Walnut, CA
Fifth Wheel Repair Near Me Walnut, CA
Travel Trailer Furniture Walnut, CA
Travel Trailer Service Walnut, CA
Cargo Trailer Repair Walnut, CA
Travel Trailer Ceiling Repair Walnut, CA
Rv Trailer Repair Shop Walnut, CA
Trailer Floor Repair Walnut, CA
Travel Trailer Replacement Windows Walnut, CA
Trailer Floor Repair Walnut, CA
Travel Trailer Furniture Walnut, CA
Finding A Good Seo Marketing Walnut, CA
Affordable Seo Company Near Me Walnut, CA
Travel Trailer Repairs Walnut, CA
OCRV Center
Table of Contents
- – Travel Trailer Roof Replacement Walnut, CA
- – OCRV Center
- – Travel Trailer Service Walnut, CA
- – Cargo Trailer Repair Walnut, CA
- – Rv Trailer Repair Shops Near Me Walnut, CA
- – Rv Travel Trailer Repair Near Me Walnut, CA
- – Camping Trailer Repair Near Me Walnut, CA
- – Trailer Restoration Walnut, CA
- – Fifth Wheel Service Walnut, CA
- – Travel Trailer Replacement Windows Walnut, CA
- – Camping Trailer Repair Near Me Walnut, CA
- – Rv Trailer Repair Near Me Walnut, CA
- – Travel Trailer Service Walnut, CA
- – Trailer Window Replacement Walnut, CA
- – Travel Trailer Replacement Windows Walnut, CA
- – Travel Trailer Floor Repair Walnut, CA
- – OCRV Center
Latest Posts
Rv Camper Ac Repair East Irvine
Pop Up Camper Roof Replacement Chino
Fullerton Wordpress Web Design
More
Latest Posts
Rv Camper Ac Repair East Irvine
Pop Up Camper Roof Replacement Chino
Fullerton Wordpress Web Design