All Categories
Featured
Table of Contents
- – Rv Slide Out Repair Near Me Guasti, CA
- – OCRV Center
- – Rv Auto Body Repair Guasti, CA
- – Rv Fiberglass Repair Near Me Guasti, CA
- – Rv Collision Repair Near Me Guasti, CA
- – Rv Body Work Guasti, CA
- – Rv Auto Body Repair Near Me Guasti, CA
- – Motorhome Collision Repair Near Me Guasti, CA
- – Rv Body Shop Repair Near Me Guasti, CA
- – Rv Frame Repair Guasti, CA
- – Rv Slide Out Repair Near Me Guasti, CA
- – Motorhome Body Repair Near Me Guasti, CA
- – Rv Fiberglass Repair Near Me Guasti, CA
- – OCRV Center
Rv Slide Out Repair Near Me Guasti, CA
At Interstate RV Metal and Supply, we provide a vast variety of competitively valued, personalized recreational vehicle devices and materials. We are devoted to finish customer fulfillment - Rv Siding Repair Guasti. This commitment is reflected in our product quality, our technique to service, and our growing checklist of loyal, pleased customers
Need to fix a tiny part of your rv's wall or roof, but don't want (or need) to damage the financial institution? A simple leak, break, crack, or damage isn't something you replace an entire roofing or wall surface for. Like the old claiming goes, "Don't toss the baby out with the bathwater".
That's why we supply these simple but highly effective fixing items for your Filon and fiberglass applications. Our Filon product just can't be defeated. Compared to other products on the marketplace it has a reduced price factor, reduced weight profile, and is stronger than a lot of while maintaining flexibility. If you need to fix your motor home, look no more! The shade of the fixing piece is arctic white, which is clean and neutral, great for any kind of motor home color.
The size of the repair service patch is about 1 foot by 1 foot, nevertheless, they are cut from a master roll, implying they will be somewhat much longer so that the client can reduce it to the exact size and width of the location they require. There are visible fibers and the item is simple to form.
Rv Auto Body Repair Guasti, CA
Have a spot that could make use of some help and you don't want to get a substantial plate of filon for simply that one spot? This repair service spot is what you need.
This site uses cookies to aid personalise web content, customize your experience and to maintain you logged in if you register. By remaining to use this site, you are granting our usage of cookies.
Consider the wall surface from an angle and check for bulges or bubbles. Many sidewalls are not perfectly flat, so this can be difficult, nonetheless, the bubble can be worse when the wall remains in straight sunlight as a result of the de-bonded product increasing at various prices. Next off, faucet gently on the wall surface with a plastic screwdriver deal with, strong areas and delaminated locations sound various.
Rv Fiberglass Repair Near Me Guasti, CA
Our package is a tool developed for usage in RV side wall surface delamination repair work that has to possible to repair or boost delaminated wall surfaces, floors, and roofs. In several instances a leak course opens permitting water to enter the wall surface. Normally this happens adjacent to home windows, vents, lights, roofing system lines, and so on.
We usually see a scenario where water breaks down the adhesive that bonds the layers of the Luann plywood. Will your items fix peeled fiberglass house siding on my recreational vehicle? Delamination happens when the bond in between several layers falls short. This can occur in separated locations, or throughout the entire wall surface panel.
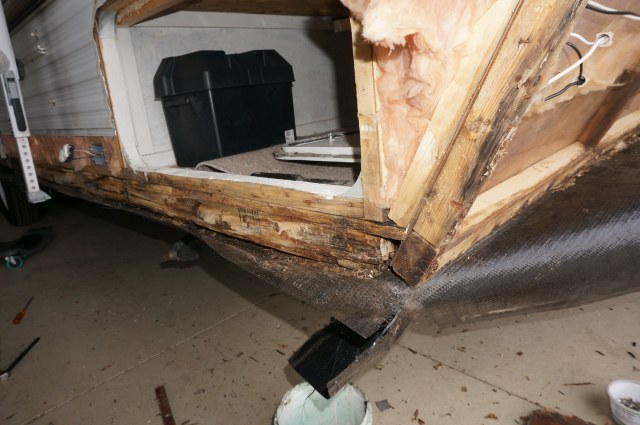
The materials are bound with each other to form a COMPOSITE FRAMEWORK. Exactly how can you find wall surface delamination? Recreational vehicle being fixed.
Rv Collision Repair Near Me Guasti, CA
The adhering to images demonstrate the treatments for a very simple sheet steel siding fixing task. The majority of fixings are not this basic or easy ... different home windows, doors, areas and various other opening will certainly complicate points as will the size of the required metal sheets. Eight foot long sheets can be taken care of by one or two people, yet sheets of 20 or more feet in length will call for 3 or 4 assistants and terrific care must be taken to avoid harming the steel as it is installed.
The top 2 panels are damaged and will be changed with new matching sheet steel. First get rid of the 2 side mouldings and the top moulding if there is one ... and the clearance lights. Pop off the clearance light lenses and remove the two screws - tear up the light setting up and eliminate the inner light bulb setting up by turning it 1/4 turn.
Rv Body Work Guasti, CA
Eliminate the staples holding the motor home exterior siding metal on - depending upon the construction utilized, the sheet metal might be folded over and stapled from the side over the back, or from the back over the side steel. Make sure not to damage or mark the intact panels! Correct the folded steel utilizing a putty blade and hammer.
The motor home siding sheets are set up individually from the top down at the manufacturing facility. The lower edge of each sheet has a "lock" or folded up part that allows the sheet to be stapled at the edges and at every upright stud in the wall surface. The top of the following sheet is inserted into the lock and afterwards that sheet is stapled on as defined over.
In order to conserve time, it is usually feasible to "pop" out a sheet as revealed below and in the photo over. Extreme treatment must be required to ensure that this sheet is not creased or altered by this operation. This allows the 2 damaged sheets over to be changed without removing all the sheets on the wall surface.
Rv Auto Body Repair Near Me Guasti, CA
The substitute sheet will be stapled in this setting to ensure that it will correctly straighten with the reduced sheet. The staples holding all-time low of the broken panel are now easily accessible and can be eliminated currently ... This photo reveals the first damaged panel gotten rid of from the trailer ...
This picture reveals both the leading 2 recreational vehicle exterior siding panels removed. The new metal sheets are delivered in a dog crate to stop delivery damage. Usually the crating and delivery charges are extra than the price of the steel! The old sheet is carefully laid over the new sheet in order to map out the form required and also the areas of the clearance light accessibility holes ... The shape of the leading curve is trimmed using tin snips ... and a hole saw is made use of to pierce out the gain access to openings for the clearance lights ... The sheet is cut and all set to be mounted ... and after that stapled into placement utilizing the arrow marks for correct positioning ... Clearance lights and mouldings are re-installed making use of brand-new putty tape and the sticker will certainly be used at a later time.
Motorhome Collision Repair Near Me Guasti, CA
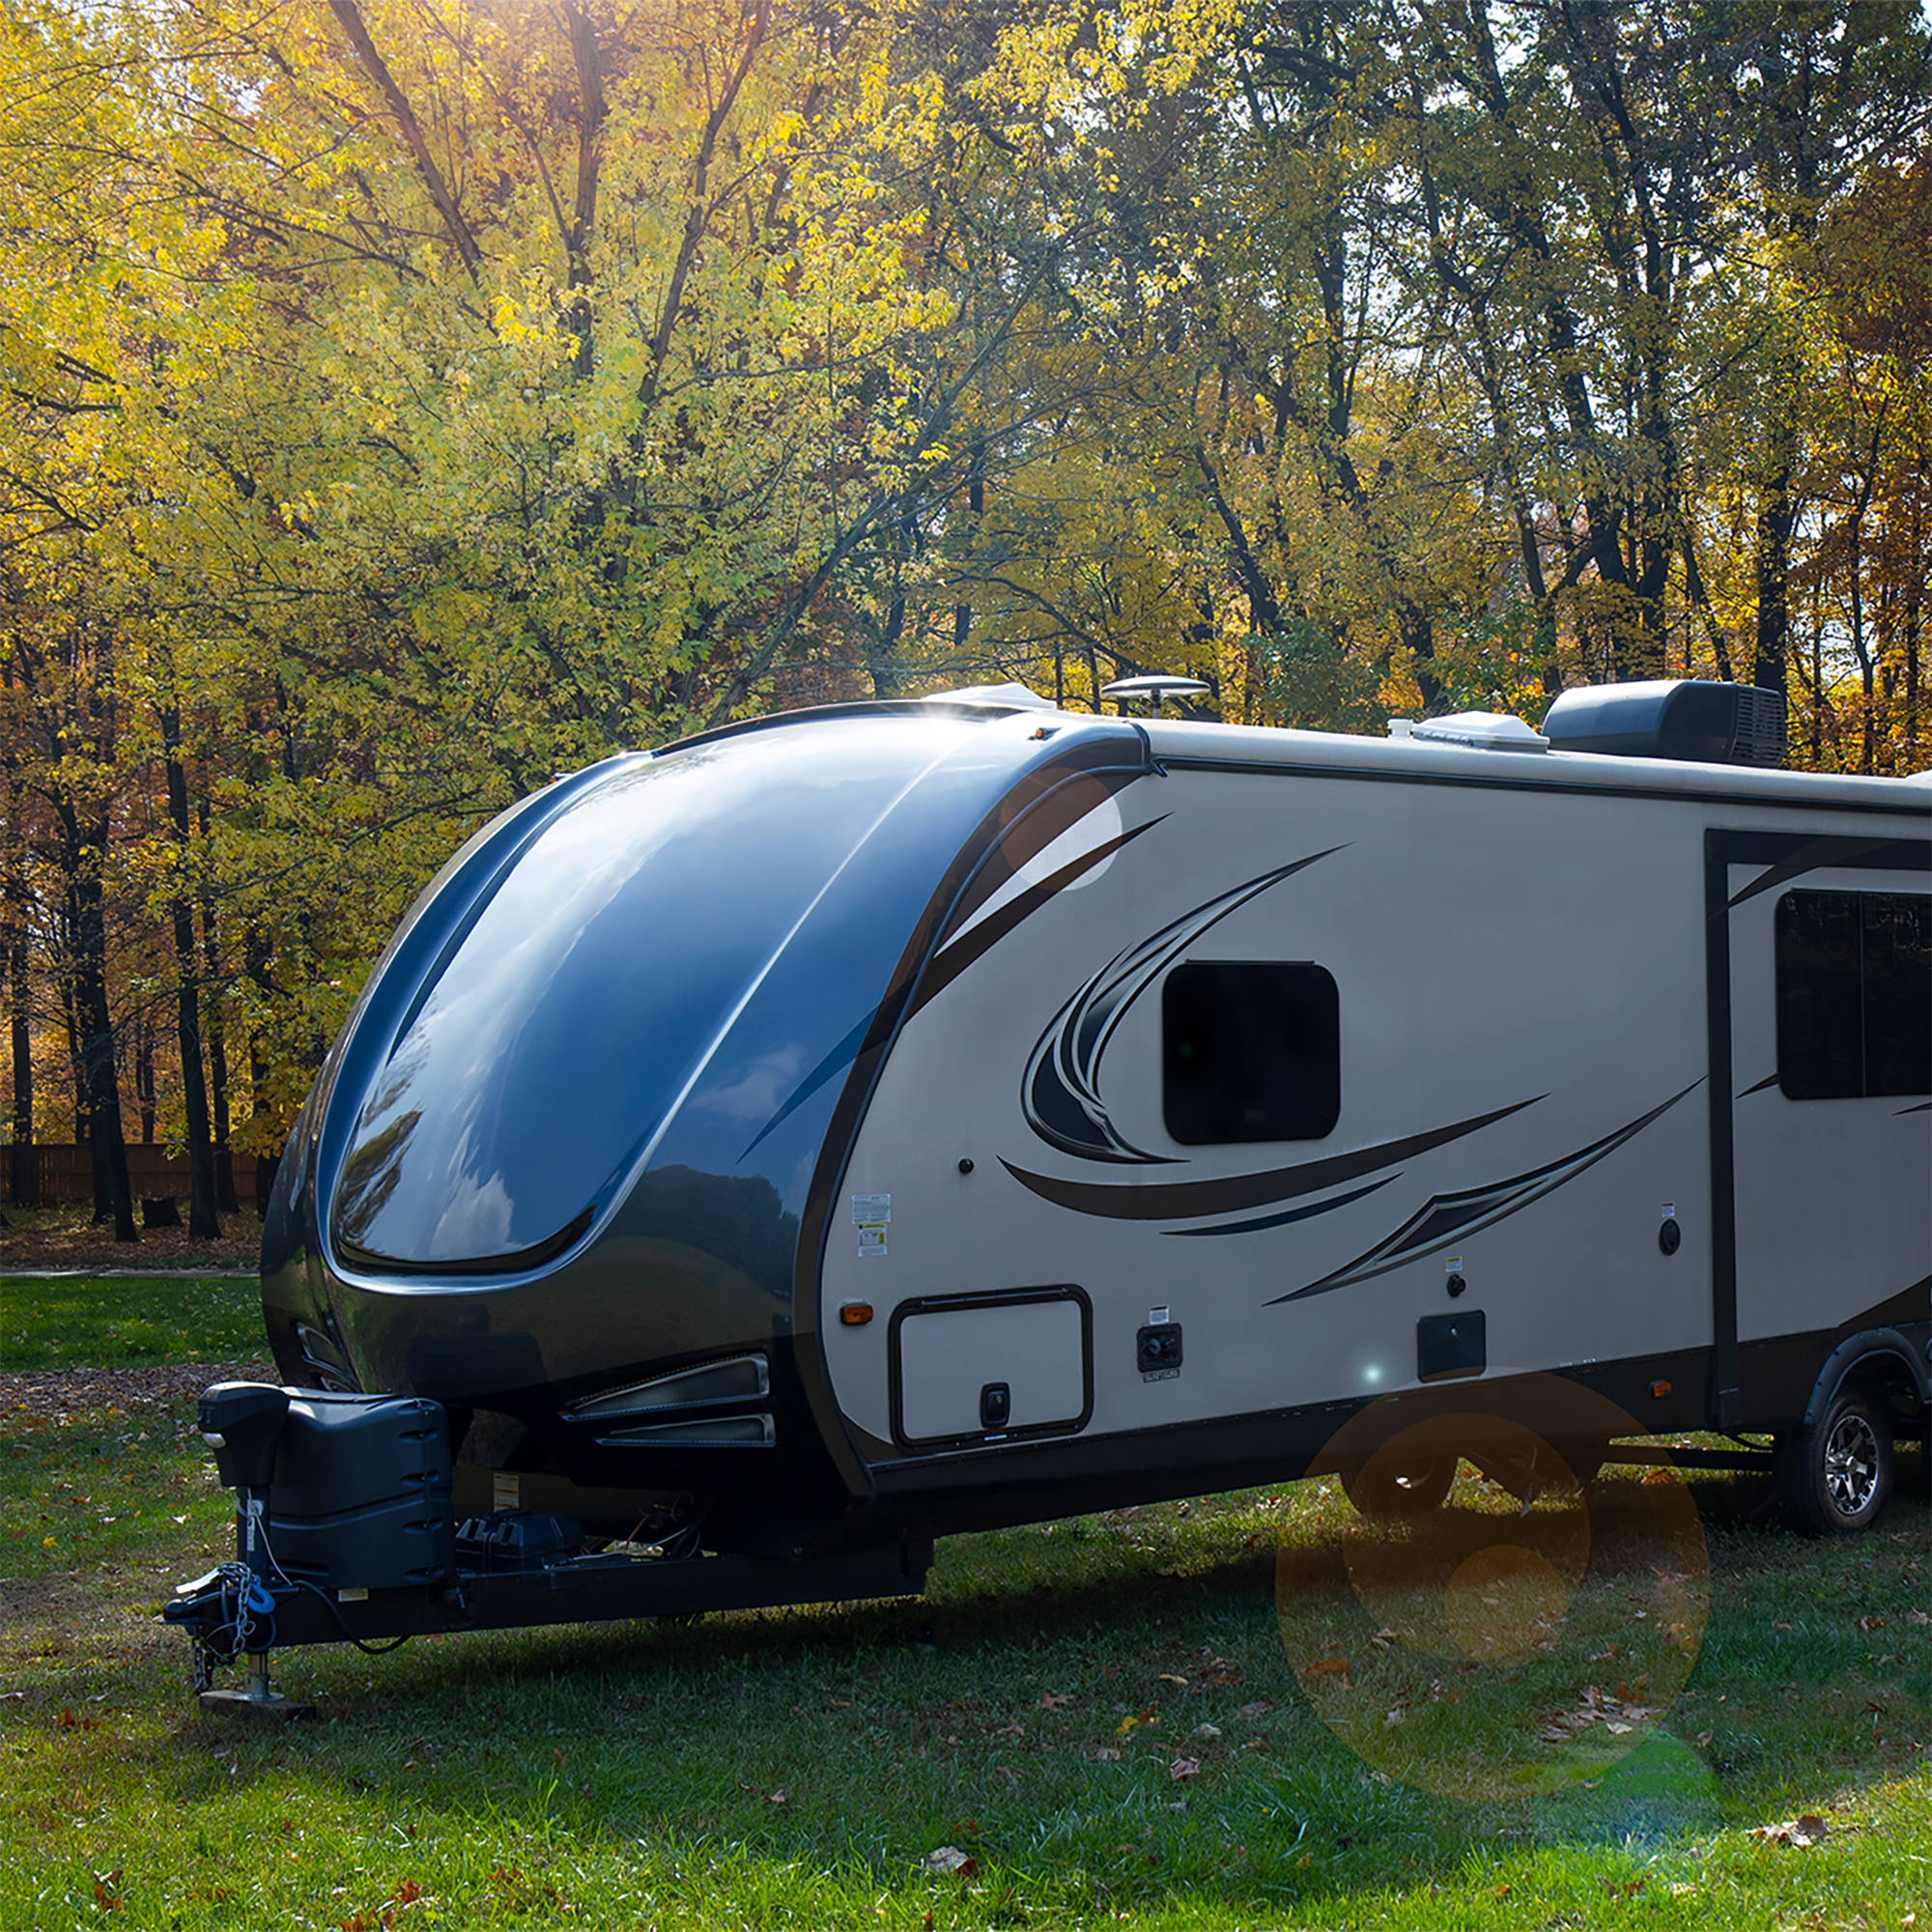
If you're brand-new to the RV globe, you may have listened to of the dreaded RV delamination. Understanding what Motor home delamination is, exactly how to fix it, and just how to avoid it is essential for every owner to recognize.
Delamination frequently leads to distorted exterior siding, bubbled wall surfaces, and water damages. Thankfully, there are means to repair this problem or avoid it from happening.
Rv Body Shop Repair Near Me Guasti, CA
We already covered the basics over, but if you want to know just how to take care of and protect against delamination, it's essential to comprehend how it occurs. Band-aid options will not repair anything in the lengthy term if you do not obtain at the origin of the trouble.
In the instance of Motor homes, lamination refers to the building of the exterior siding. If the plywood begins to come loose from the outer layers, that's where RV delamination starts.
If you see a RV with deformed house siding, it's in a state of delamination. Also though this might seem like a cosmetic problem, delamination is a significant issue for Motor homes.
Rv Frame Repair Guasti, CA
Delamination weakens the structure of your vehicle, welcomes water damage, and can lead to persistent developments of mold. Having a bumpy exterior can additionally make your Motor home much less wind resistant.
Be specifically mindful to inspect for delamination if you're getting a made use of Motor home. If the RV delamination is as well serious, it can be hard to repair.

Yet if you capture it early, there are points you can do to fix this problem. Serious recreational vehicle delamination is challenging to take care of, particularly if water damages has actually established in. If the plywood has actually begun to rot, the only way to repair it is to completely disrobe the walls and change them with a fresh structure.
If the process has only simply started and hasn't obtained too much, there are a few solutions that owners can attempt. The first choice is a delamination fixing set. These expense regarding $80-150 and included a high-strength bonding representative. This can be used to reseal the fiberglass to the underlying layers of the RV.
Rv Slide Out Repair Near Me Guasti, CA
Many packages also feature syringes that can be used to fill hard-to-reach spots. When you're satisfied with the level of repair service you've done, it's essential to seal up any kind of fractures and seams in the motor home exterior. Utilizing an excellent caulk is important, and you can provide an additional layer of defense by using a safety motor home wax/coating.
Lots of people locate that these fixings are not worth the expense and offer up the RV as a lost cause. Some Motor home owners with a lot of devices, time, and expertise have actually been successful at repairing delamination damages by themselves, yet this is impractical for a lot of people.
With any luck, you'll never ever have to deal with RV delamination to begin with. A lot of Recreational vehicles are durable and can hold up to the wear and tear of a life when traveling. Delamination is certainly something to be conscious of, yet it's not a risk that every RV proprietor encounters.
Motorhome Body Repair Near Me Guasti, CA
The primary source of delamination is splits or seams in the outside that allowed water in. If you're diligent and frequently use a lap sealer to these locations, you'll vastly boost your opportunities of preventing delamination. Dicor products are excellent for this objective! You must likewise take measures to keep your recreational vehicle clean and dry.
The even more security you can offer the surface area, the far better your opportunities are of staying clear of RV delamination. See to it you keep an eye on all your RV repair and maintenance with an on-line device such as motor home LIFE Upkeep from RV LIFE. Not only can you maintain every one of your records in one place, yet you'll additionally obtain prompt pointers when upkeep results from aid you prevent expensive repair work and possibly severe accidents.
Rv Fiberglass Repair Near Me Guasti, CA
Hi all - very first time traveling trailer owner below (Imagine 2500RL 2023). I made a pinhead novice action this weekend break. Was setting up television install in master room and utilized lag screws that were too lengthy and all 5 of them punched out the outside sidewall. The openings are little so for now I plugged them with white and black waterproof silicon.
INQUIRY: I bought from a supplier that has a solution facility nearby. Any individual had a similar circumstance and has more of an occupation outside siding fixing procedure. Many thanks.
Rv Collision Repair Shops Near Me Guasti, CARv Body Repair Near Me Guasti, CA
Rv Body Repair Near Me Guasti, CA
Rv Collision Repair Shop Guasti, CA
Rv Fiberglass Siding Repair Guasti, CA
Motorhome Body Repair Near Me Guasti, CA
Rv Body Shop Repair Near Me Guasti, CA
Rv Collision Repair Near Me Guasti, CA
Rv Wall Repair Guasti, CA
Rv Wall Repair Guasti, CA
Motorhome Body Repair Near Me Guasti, CA
Rv Collision Repair Near Me Guasti, CA
Rv Auto Body Repair Guasti, CA
Rv Body Damage Repair Guasti, CA
Rv Collision Repair Near Me Guasti, CA
Rv Body Work Guasti, CA
Rv Body Shop Repair Near Me Guasti, CA
Rv Body And Paint Repair Guasti, CA
Rv Collision Repair Shops Near Me Guasti, CA
Rv Frame Repair Guasti, CA
Rv Siding Repair Guasti, CA
Rv Slide Out Repair Near Me Guasti, CA
Rv Collision Repair Near Me Guasti, CA
Rv Siding Repair Guasti, CA
Rv Wall Repair Guasti, CA
Motorhome Fiberglass Repair Guasti, CA
Rv Auto Body Repair Near Me Guasti, CA
Rv Slide Out Repair Near Me Guasti, CA
Motorhome Body Repair Near Me Guasti, CA
Rv Collision Repair Guasti, CA
Rv Slide Out Repair Near Me Guasti, CA
Rv Repair Body Shop Guasti, CA
Rv Body And Paint Repair Guasti, CA
Motorhome Body Repair Near Me Guasti, CA
Rv Paint And Body Repair Guasti, CA
Motorhome Body Repair Near Me Guasti, CA
Rv Auto Body Repair Near Me Guasti, CA
Rv Collision Repair Shops Near Me Guasti, CA
Rv Auto Body Repair Near Me Guasti, CA
Motorhome Body Repairs Near Me Guasti, CA
Motorhome Collision Repair Near Me Guasti, CA
Rv Body Shop Guasti, CA
Rv Siding Repair Guasti, CA
Rv Body Shop Repair Near Me Guasti, CA
Rv Body Damage Repair Guasti, CA
Rv Collision Repair Shops Near Me Guasti, CA
Rv Siding Repair Guasti, CA
Motorhome Full Body Paint Guasti, CA
Rv Slide Out Repair Near Me Guasti, CA
Rv Paint And Body Repair Guasti, CA
Rv Body Repair Near Me Guasti, CA
Motorhome Fiberglass Repair Guasti, CA
Rv Wall Repair Guasti, CA
Best Rv Collision Repair Near Me Guasti, CA
Rv Collision Repair Guasti, CA
Rv Body Repair Shop Near Me Guasti, CA
Motorhome Full Body Paint Guasti, CA
Rv Repair Body Shop Guasti, CA
Rv Auto Body Repair Guasti, CA
Motorhome Body Shop Near Me Guasti, CA
Rv Fiberglass Siding Repair Guasti, CA
Rv Collision Repair Shops Near Me Guasti, CA
Rv Wall Repair Guasti, CA
Rv Body And Paint Repair Guasti, CA
Rv Repair Body Shop Guasti, CA
Rv Body Shop Repair Near Me Guasti, CA
Motorhome Body Repair Near Me Guasti, CA
Motorhome Body Repair Near Me Guasti, CA
Rv Body Repair Near Me Guasti, CA
Rv Frame Repair Guasti, CA
Rv Body Shop Repair Near Me Guasti, CA
Rv Siding Repair Guasti, CA
Rv Body Shop Guasti, CA
Motorhome Body Repairs Near Me Guasti, CA
Rv Slide Out Repair Near Me Guasti, CA
Rv Body Repair Near Me Guasti, CA
Motorhome Fiberglass Repair Guasti, CA
Rv Body And Paint Repair Guasti, CA
Best Seo Optimization Guasti, CA
In My Area Seo Marketing Agency Guasti, CA
OCRV Center
Table of Contents
- – Rv Slide Out Repair Near Me Guasti, CA
- – OCRV Center
- – Rv Auto Body Repair Guasti, CA
- – Rv Fiberglass Repair Near Me Guasti, CA
- – Rv Collision Repair Near Me Guasti, CA
- – Rv Body Work Guasti, CA
- – Rv Auto Body Repair Near Me Guasti, CA
- – Motorhome Collision Repair Near Me Guasti, CA
- – Rv Body Shop Repair Near Me Guasti, CA
- – Rv Frame Repair Guasti, CA
- – Rv Slide Out Repair Near Me Guasti, CA
- – Motorhome Body Repair Near Me Guasti, CA
- – Rv Fiberglass Repair Near Me Guasti, CA
- – OCRV Center
Latest Posts
Laguna Beach Vision And Dental Insurance For Seniors
Medicare Insurance Agent Near Me San Clemente
Brea Planning Life Insurance
More
Latest Posts
Laguna Beach Vision And Dental Insurance For Seniors
Medicare Insurance Agent Near Me San Clemente
Brea Planning Life Insurance